

Table of Contents
- Why a Gallery Wall Works in Compact Spaces
- Gallery Wall Layout Ideas That Maximize Your Small Wall Space
- Gallery Wall Templates for Small Apartments: Measurements That Work
- Getting Spacing Right: Gallery Wall Spacing Guidelines
- Planning Your Layout Before You Hang Anything
- Renter-Friendly Gallery Wall Ideas: Hanging Without Permanent Damage
- Choosing Artwork and Creating Visual Balance
- Step-by-Step: Measuring and Hanging Your Gallery Wall
- Frequently Asked Questions
Last Updated: October 10, 2026
Why a Gallery Wall Works in Compact Spaces
A gallery wall small apartment transforms bare walls into focal points without eating up floor space. When you're working with limited square footage, vertical real estate becomes your best friend.
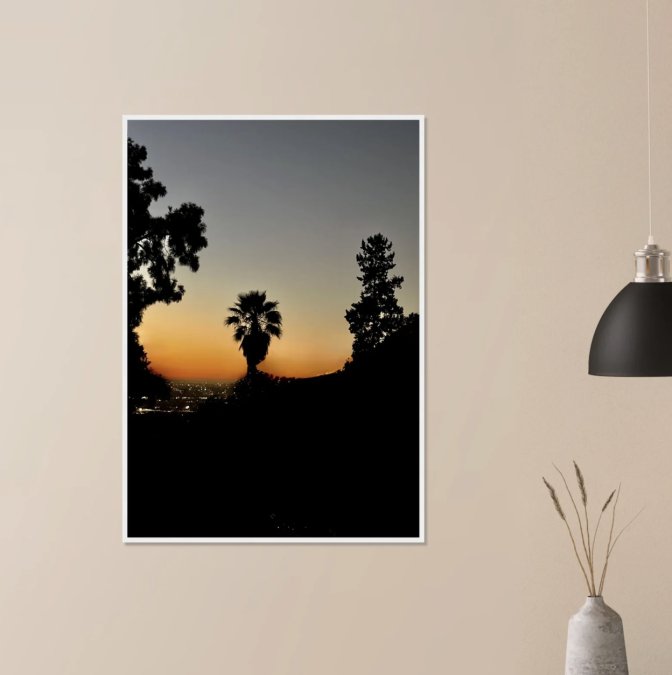
The magic is in the curation. A thoughtfully arranged gallery wall tells a story about who you are, your travels, your aesthetic, the moments that matter to you. Whether you're displaying travel photography, abstract prints, or a mix of both, the arrangement itself becomes the design.

Small apartments don't need fewer pieces. They need smarter planning. A well-spaced gallery wall actually makes a compact room feel larger by anchoring the space and creating visual interest that draws attention away from cramped dimensions.
Gallery Wall Layout Ideas That Maximize Your Small Wall Space
You have three proven layout styles that work beautifully in tight spaces. Each creates a different mood while respecting the constraints of apartment living.
The Grid Arrangement
A grid layout is the most structured approach. You arrange frames in even rows and columns, think a 2x3 or 3x3 pattern, with consistent spacing between each piece. This works especially well for a gallery wall small apartment because it's clean, organized, and makes the wall feel intentional rather than cluttered.
Grid layouts work best when your frames are similar in size. You can mix horizontal and vertical orientations, but keeping widths consistent creates visual harmony. This style suits minimalist apartments or rooms with modern furniture where order feels natural.
The grid approach also makes hanging much easier. Once you establish your grid, the math becomes straightforward: mark your positions, hang in rows, and you're done.
The Salon-Style Mix
Salon-style means mixing frame sizes, orientations, and even artwork types, photographs next to prints, large pieces next to small ones. It feels curated and intentional, like you've collected treasures over time rather than buying a matching set.
This layout requires more planning but creates visual richness in small spaces. The varying sizes and angles keep the eye moving across the wall, which can actually make a compact room feel more dynamic and spacious.
Salon-style works when you have a strong color palette tying pieces together. CaliCuration's travel photography collections, from Mediterranean sunsets to urban street signs, blend beautifully with abstract prints and black-and-white imagery because they share a cohesive mood.

The Linear Stack
A vertical line of frames creates a tall, narrow gallery. This layout is perfect for small apartments because it draws the eye upward without spreading horizontally. You can stack frames directly above a piece of furniture, a console table, shelf, or sofa, where they become a natural focal point.
Linear stacks work best with 4-6 pieces arranged vertically. Keep spacing consistent and you've got a sophisticated, gallery-like feel in minimal wall space.
Gallery Wall Templates for Small Apartments: Measurements That Work
Here's what works reliably in compact spaces. These measurements assume standard ceiling heights and typical apartment wall dimensions.
For a 4-foot wide wall:
- Total wall space: 48 inches wide
- Best layout: 2-3 pieces wide, 2-3 pieces tall
- Frame spacing: 2-3 inches between frames
- Total gallery width: 36-42 inches (leaving 3-6 inches margin on each side)
For a 6-foot wide wall:
- Total wall space: 72 inches wide
- Best layout: 3-4 pieces wide, 2-3 pieces tall
- Frame spacing: 2-3 inches between frames
- Total gallery width: 54-66 inches (leaving 3-9 inches margin on each side)
For a tall, narrow wall (above a console or shelf):
- Wall space: 24-36 inches wide
- Best layout: 1-2 pieces wide, 4-5 pieces tall
- Frame spacing: 2-3 inches between frames
- Total gallery height: 48-60 inches
These templates work because they account for margin space. Never run your gallery edge-to-edge on a wall, the breathing room makes it feel intentional rather than crowded.
| Wall Width | Ideal Pieces | Frame Spacing | Best Layout |
|---|---|---|---|
| 3-4 feet | 4-6 total | 2-3 inches | 2x2 or 2x3 grid |
| 4-6 feet | 6-9 total | 2-3 inches | 3x2 or 3x3 grid |
| 6+ feet | 9-12 total | 2-3 inches | 4x3 or mixed salon |
| Vertical space | 4-6 total | 2-3 inches | Linear stack |
Getting Spacing Right: Gallery Wall Spacing Guidelines
Spacing makes or breaks a gallery wall. Too tight and it feels chaotic. Too loose and pieces float disconnected from each other.
The sweet spot is 2-3 inches between frames. This creates visual cohesion, pieces feel grouped together, while maintaining enough air to prevent the wall from looking cramped.
Consistent spacing matters more than perfect spacing. If every gap is 2.5 inches, your eye accepts it as intentional. If gaps vary between 1 inch and 4 inches, the arrangement feels accidental.
Horizontal alignment is your second priority. Keep the tops of frames level, or keep the bottoms level, or center them vertically, pick one and stick with it.
Planning Your Layout Before You Hang Anything
This is where most people skip steps and end up frustrated. A few minutes of planning saves hours of wall damage and re-hanging.
Test on the Floor First
Lay out your frames on the floor in the exact arrangement you're planning. Stand above them and look down. Does the spacing feel right? Are the pieces balanced? Does the overall composition draw your eye in a pleasing way?
This floor test reveals problems before you touch the wall. You can adjust spacing, swap pieces, or completely rethink the layout without making holes.
Use the Paper Template Method
Cut kraft paper or newspaper to the exact size and shape of each frame. Tape these templates to your wall with painter's tape. Step back and view the arrangement from different angles, sitting down, standing up, from across the room.
This method lets you see how your gallery will actually look on the wall. You catch spacing issues, alignment problems, and composition concerns before a single nail goes in. Adjust the paper templates until you're happy, then use them as guides for marking your nail positions.
The paper template method saves you from the frustration of hanging, unhanding, and re-hanging frames.
Renter-Friendly Gallery Wall Ideas: Hanging Without Permanent Damage
Renters need solutions that don't damage walls. You have solid options that hold frames securely without leaving permanent marks.
Adhesive Strips and Damage-Free Hangers
Command strips and similar adhesive solutions work for lightweight frames, roughly up to 5 pounds per strip. They're perfect for small apartment walls where you're hanging prints and photographs without heavy wooden frames.
For heavier frames, damage-free picture hangers use a special hook design that distributes weight across a small area. They leave tiny holes that are easy to patch.
The advantage: you can rearrange your gallery wall multiple times without accumulating visible damage. When you move, you patch small holes with spackling compound.
Picture Ledges and Floating Shelves
Picture ledges let you display frames without any wall damage. You simply lean frames against the ledge. This approach works beautifully for gallery walls because you can easily swap pieces, adjust spacing, and rearrange without touching the wall.
Floating shelves offer the same flexibility. A 24-36 inch shelf can hold 4-6 frames depending on frame depth. Stack them in a salon-style arrangement or lean them at slight angles for visual interest.
The trade-off: ledges and shelves take up a few inches of wall depth. In a small apartment, this matters. But if you have a console table, dresser, or shelf already in the room, adding a picture ledge above it is often the easiest solution.
Choosing Artwork and Creating Visual Balance
Your gallery wall succeeds when pieces feel connected.
CaliCuration's travel photography collections work beautifully in gallery walls because they share a warm, authentic aesthetic.
Mix frame styles, but keep the overall color palette cohesive. Black frames with natural wood frames work together. Gold accents with silver don't.
Include three-dimensional elements to add depth. A small plant, a decorative object, or a sculptural piece breaks up the flatness of a wall of frames.
Balance is about visual weight, not symmetry. A large piece on one side can be balanced by several smaller pieces on the other.
Step-by-Step: Measuring and Hanging Your Gallery Wall
Now you're ready to execute. Follow this process and your gallery wall will be level, properly spaced, and exactly where you want it.
Step 1: Mark Your Center Point
Find the center of your wall space. If you're hanging above a sofa, find the center of the sofa. If you're filling a wall between two windows, find the center between them. Mark this point lightly with a pencil.
Your center point becomes your anchor. Most gallery walls work outward from center, so establishing this first prevents the whole arrangement from drifting left or right.
Measure the height where you want the center of your gallery. A good rule: the center should be at eye level when you're standing in the room, roughly 57-60 inches from the floor.
Step 2: Map Out Frame Positions
Using your paper templates or measurements, mark where each nail or hook will go. Use a level to ensure horizontal alignment. A level makes this much easier.
Mark lightly in pencil. You're creating a map that guides your hanging. Double-check spacing between marks, this is your last chance to catch alignment issues before making holes.
If you're using adhesive strips, mark the spots where the top corners of each frame will sit. This ensures the frame hangs level.
Step 3: Install Anchors and Hang Frames
For nail-based systems: use appropriate wall anchors for your wall type.
Install your anchors first, then hang frames one at a time from the center outward. This prevents the domino effect where one crooked frame throws off everything else.
For adhesive strips: follow the manufacturer's instructions exactly. Clean the wall, apply strips, and wait the recommended time before hanging.
Step 4: Add Decorative Objects and Adjust
Once frames are hung, add any three-dimensional elements.
Step back and view from across the room. Make final spacing and alignment adjustments. Small tweaks here make the difference between "nice" and "wow."
We believe your walls should reflect the places and moments that matter to you.
Start with a clear layout plan. Test your arrangement on the floor. Use damage-free hanging methods if you're renting. Mix pieces that share a mood rather than matching perfectly.
When you're selecting artwork, consider pieces that carry authentic emotion and authentic moments, the kind of travel photography and lifestyle imagery that reminds you why certain places matter.
Frequently Asked Questions
How do you arrange a gallery wall in a small apartment?
Start by choosing your layout style, grid, salon-style, or linear, based on your wall dimensions. Test your arrangement on the floor first, then use paper templates to mark frame positions on the wall. Small apartments benefit from layouts that emphasize negative space and visual balance. Maintain consistent spacing (typically 2-3 inches between frames) to create a cohesive collection. Our Build Your Own Cloud Wall kit ($124.20) lets you customize your arrangement before committing to hanging, making it ideal for apartment dwellers.
What spacing should you use between frames in a gallery wall?
The standard spacing between frames in a gallery wall is 2-3 inches. This distance creates visual rhythm without overwhelming a small wall space. Measure twice before marking holes to ensure even spacing across your entire arrangement. If your apartment has limited wall space, slightly tighter spacing (2 inches) can work well. Use a level and measuring tape to maintain consistency, uneven spacing disrupts the cohesive collection you're building and can make a small space feel chaotic.
Can you create a gallery wall in a rental apartment without damaging walls?
Yes. Adhesive strips rated for picture frames work well on most apartment walls and leave no permanent damage when removed. Picture ledges and floating shelves offer another renter-friendly option, they mount securely but can be removed without wall damage. Test your chosen method on a small frame first. Use the gentlest hanging method that safely supports your artwork's weight.
How many pictures should you include in a small apartment gallery wall?
For a small wall space (under 4 feet wide), start with 5-9 pieces, a mix of framed prints, photographs, and smaller decorative objects. Too many pieces create visual clutter; too few leave the wall feeling sparse. The key is balancing negative space with your artwork. Consider the visual weight of each piece: bold, dark prints take up more visual space than light, minimal designs. Our framed pieces like the London Tube Escalator poster and Mediterranean Sunset are sized to work well in compact arrangements without overwhelming small rooms.