

California travel photography is the practice of capturing the state’s strikingly diverse landscapes, from salt-kissed coastlines to bone-dry desert flats, using techniques and timing tailored to each environment. No other state packs this much visual contrast into one place. The coast glows gold at dusk, the desert burns copper at dawn, and the cities pulse with layered light long after sunset. Getting it right means understanding how light, gear, and location work together. This guide walks you through the core principles so you can bring home images that feel as alive as the places themselves.
What are the essential techniques and gear for California travel photography?
The right gear makes a real difference when you are moving between environments as different as Big Sur and Death Valley in the same trip. A wide-angle lens captures sweeping coastal cliffs and vast desert plains. A telephoto lens lets you isolate textures, compress dune patterns, and pull distant mountains into the frame. Both belong in your bag.
For settings, shutter speeds of 1/250–1/500sec and apertures between f/5.6 and f/8 work well for most landscape and travel scenes. When you want a sunstar effect, stop down to f/16. A circular polarizer cuts glare on water and deepens blue skies. A neutral density filter lets you slow the shutter for silky water or streaking clouds without blowing out the exposure.
A sturdy tripod is non-negotiable for golden hour and blue hour work. It keeps your frame steady when the light drops low and shutter speeds slow. Pair it with manual exposure settings rather than relying on automatic white balance, especially in desert environments where cameras tend to exaggerate blue casts in the shadows.
-
Wide-angle lens (16–24mm): Best for coastlines, valleys, and urban skylines
-
Telephoto lens (70–200mm or longer): Isolates texture and compresses distant layers
-
Circular polarizer: Reduces glare, enriches color on water and sky
-
Neutral density filter: Extends exposure time for motion blur in bright light
-
Sturdy tripod: Keeps shots sharp during low-light golden and blue hour sessions
-
Extra batteries and dust-sealed bags: Critical for desert shoots where heat and sand drain and damage gear fast
Pro Tip: Shoot a test frame in manual mode before golden hour begins. Dialing in your exposure early means you spend the best light shooting, not adjusting.
Editing should preserve the natural palette of each environment. California’s colors are already rich. Pushing saturation too far turns a warm desert amber into something artificial. Pull highlights, lift shadows gently, and let the scene breathe.
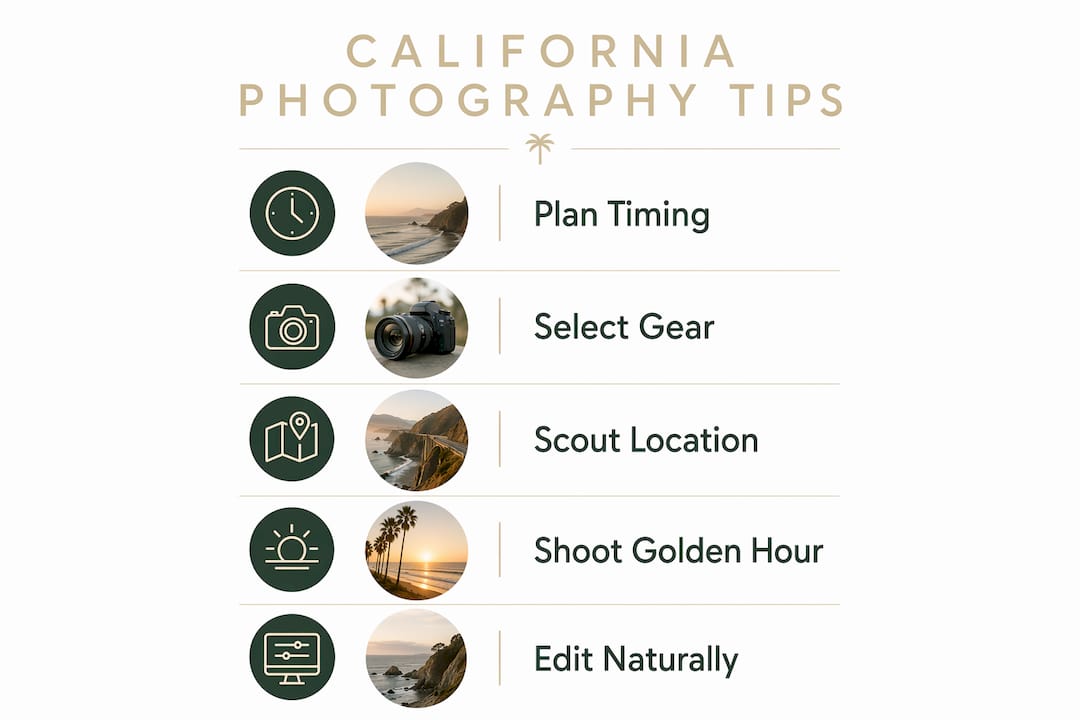
How does California’s environment shape your photography approach?
California’s geography demands a different mindset for each zone. The approach that works on the Marin Headlands will not serve you in Joshua Tree. Here is how to read each environment and respond to it.
-
Coastal scenes: Shoot during golden hour and blue hour to avoid the flat, washed-out look that midday sun creates on water and sand. The soft directional light at dawn and dusk wraps around sea stacks and cliffs, adding depth and warmth. Fog along the Northern California coast can actually work in your favor, softening backgrounds and creating mood.
-
Desert landscapes: The Mojave and the Sonoran reward patience and a shift in perspective. Desert photography success comes from focusing on simplicity and detail, like the ripple of a dune or the cracked geometry of a salt flat, rather than always chasing the wide dramatic vista. Get low. Look for leading lines in the sand. Let the foreground tell the story.
-
Mountain and forest zones: Yosemite and the Sierra Nevada offer layered light that shifts quickly. Early morning mist in the valley floor creates natural separation between elements. Overcast days soften harsh shadows under the tree canopy, making forest interiors easier to expose correctly.
-
Urban environments: San Francisco and Los Angeles reward photographers who plan around transit and walkable clusters. The Bay Area’s hills create natural elevation for wide city shots. In Los Angeles, the interplay of neon, streetlight, and smog at dusk produces a warm amber glow that feels cinematic. Shoot from elevated vantage points to capture that layered city depth.
Seasonal and weather factors shape every one of these environments. Coastal fog is thickest in june and july. Desert wildflowers peak in march and april after a wet winter. Mountain snowpack creates mirror-like reflections in Yosemite’s valley through may.
When and where should we plan California photography trips?
Spring and fall are the best seasons to photograph California. Temperatures are moderate, crowds are thinner, and the light is cleaner. Summer brings haze that degrades telephoto shots and packs popular locations with visitors. Winter can be spectacular in the mountains but limits desert access after storms.
| Location | Best Season | Best Time of Day | What to Capture |
|---|---|---|---|
| Big Sur | Spring, Fall | Golden hour | Sea cliffs, Bixby Bridge, coastal fog |
| Death Valley | Fall, Winter | Dawn, dusk | Dunes, salt flats, badlands |
| San Francisco | Spring, Fall | Blue hour, golden hour | Skyline, bridges, fog rolling in |
| Yosemite Valley | Spring | Early morning | Waterfalls, valley mist, granite walls |
| Joshua Tree | Fall, Winter | Sunrise | Rock formations, desert sky, Joshua trees |
The midday four-hour window is best used for scouting, logistics, rest, and image review. That is not wasted time. Walking a location in flat light teaches you exactly where to stand when the golden light arrives. You can also check Southern California coastal spots in advance to plan your angles before the shoot.
Pro Tip: Cluster your shooting locations geographically. Plan golden hour at one spot, then walk or rideshare to your blue hour location nearby. This approach, used by professional travel photographers, keeps you shooting instead of commuting.
How can we adapt when conditions get difficult?
California’s light and weather change fast. The ability to adapt is what separates a good trip from a great one.
-
Harsh midday light: Use shade, shoot into shadow, or reframe to exclude the sky entirely. Architectural details and street-level urban scenes hold up well in flat overhead light.
-
Flat or hazy skies: Switch to a telephoto lens and isolate textures instead of shooting wide. Compressed dune ridges or layered mountain ranges read beautifully even when the sky is uninspiring.
-
High-contrast desert scenes: Shield the sun with your hand during the exposure to protect highlights and preserve shadow detail. This simple manual technique gives you cleaner foregrounds and more latitude in post-processing.
-
Dust and sand: Keep a sealed bag for your camera body when not shooting. Use a lens cloth frequently. Sand finds its way into every gap, and a single grain on your sensor ruins a series of shots.
-
Gear protection on the road: Travel insurance for cameras is worth considering for any extended California trip, especially if you are carrying telephoto glass into dusty desert environments.
Patience is the most underrated technique in travel photography. Conditions that look uninspiring at 10:00 AM can transform completely by 5:30 PM. Stay flexible, stay curious, and do not pack up early.
Key Takeaways
California travel photography rewards photographers who plan around light, adapt to each environment, and resist the urge to shoot only the obvious vistas.
| Point | Details |
|---|---|
| Shoot during golden and blue hours | Midday sun creates flat, harsh light; dawn and dusk produce the warmth and depth California landscapes deserve. |
| Match your lens to the environment | Wide-angle for coasts and valleys; telephoto for desert textures and hazy skies. |
| Plan trips in spring or fall | Moderate temperatures, lower crowds, and cleaner light make these seasons ideal for California photography. |
| Use midday for scouting | Walk your locations in flat light so you know exactly where to stand when the good light arrives. |
| Adapt rather than quit | Flat skies and harsh light are not failures. Switching techniques and lenses keeps compelling images coming. |
What California’s variety has taught us about seeing slowly
The most honest thing we can say about photographing California is this: the state will humble you before it rewards you. We have stood at Zabriskie Point in Death Valley at what felt like the perfect moment, only to realize the real shot was six inches from our feet, a cracked mud pattern catching the last sliver of amber light. California does not always hand you the epic frame. Sometimes it asks you to slow down and look at what is right in front of you.
The variety here is genuinely challenging. Switching from coastal fog photography to desert heat in the same week requires a mental reset, not just a gear swap. We have found that the photographers who struggle most are the ones chasing a single style across every environment. The coast wants softness and patience. The desert wants stillness and precision. The city wants energy and timing. Letting each place set the terms produces images that feel true to where they were made.
The unexpected conditions are often the most memorable. A dust haze over the Mojave that looked like a ruined shoot produced some of the warmest, most atmospheric frames we have ever made. Stay out. Stay curious. California will meet you there.
— Info
California’s light, captured and kept
If a shoot in California leaves you with images that feel alive, the next question is what to do with them. Calicuration was built around exactly that feeling: the warmth of a California moment worth holding onto.
Every piece in the California wall art collection is made from original, founder-shot travel photography, printed on demand so the quality stays consistent and the story stays intact. Coast, desert, city glow, and everything between. If you want to see the range of environments and styles, the featured artists gallery is a good place to start. And because giving back matters to us, 5% of every order supports community impact efforts in Los Angeles and New York City.
FAQ
What is California travel photography?
California travel photography is the practice of capturing the state’s diverse environments, including coastlines, deserts, mountains, and cities, using techniques and timing tailored to each location’s unique light and conditions.
When is the best time to photograph California?
Spring and fall offer the best conditions: moderate temperatures, lower crowds, and cleaner light. Summer haze degrades telephoto shots and fills popular locations with visitors.
What gear do I need for California landscape photography?
A wide-angle lens, a telephoto lens, a sturdy tripod, a circular polarizer, and neutral density filters cover most California environments. Dust-sealed bags and extra batteries are critical for desert shoots.
How do I handle harsh midday light in the desert?
Use the midday window for scouting rather than shooting. When you must shoot in bright conditions, switch to a telephoto lens to isolate textures, or shield the sun manually to protect highlights and preserve shadow detail.
What are the best California locations for travel photography?
Big Sur, Death Valley, San Francisco, Yosemite Valley, and Joshua Tree each offer distinct visual character. Each location rewards photographers who arrive during golden or blue hour and scout their angles in advance.
Recommended
-
The Best Spots in Southern California to Photograph Sunsets, Beaches & – CaliCuration
-
The Role of Color in California Art: A Deep Dive – CaliCuration
-
California Winter Light: Cozy Color & Art Styling Guide – CaliCuration
-
Hidden iPhone 16 & 17 Camera Features Every Traveler Should Know — Wit – CaliCuration